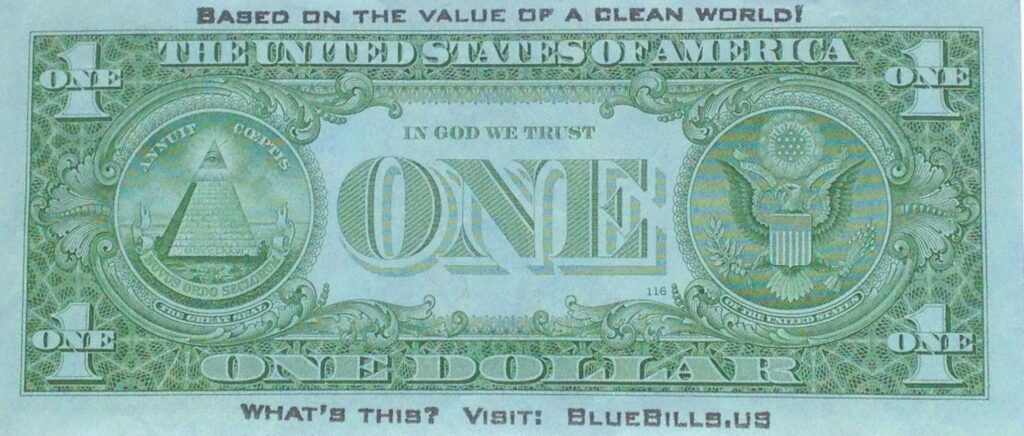
BlueBills are in circulation but are rare. The best way to get them is to dye your own.
Dying regular (green) US currency blue not only alters the color but ritually cleanses the money itself. You can dye bills perfectly well without awareness of this, but since it is a powerful ritual for scrubbing money of any shady past, we hope you will make that awareness part of your participation in dying clean currency.
We do ask that you not sell BlueBills for more than face value. Even though BlueBills are hard to find and people want them, making them scarce and therefor “valuable” in the eyes of the regular money system, this movement is one of belief in ABUNDANCE, not raw profit. Think of BlueBills as abundant enough to waste, not because they are easy to find but because anyone can make their own and the impulse behind BlueBills is a healthier world. Sure they are worth more than regular money, but let this extra value be the gift you delight in sharing!
You can get fresh new bills at any bank. [And don’t worry about screwing it up; even if you mess up the printing or accidentally render your bills “un-negotiable” they can still be recycled at the bank.]
You have to start with real currency. (No cheating! That shit will land you in jail.)
Quick Method for Printing the Text:
If you are only printing a few bills or the bills are not very flat (to feed easily into a printer) you can easily print a few bills with the text above using these instruction. If you’re doing more than a few, skip to the Blue Production Method instructions below.
- Download the BlueBills Text Sheet below and print it on normal office paper (US Letter size), noting which direction you fed the sheet in.
- Lay a bill face down on top of the text printed on your text sheet using the rectangle as a positioning guide and orienting the bill the same up/down direction as the text.
- Tape the leading edge (the edge that gets sucked into the printer) directly on top of the printed lines of the test sheet so the margins of the bill lines up with the text. (start with a bill-size piece of paper to test the process).
- When the test run lines up to your satisfaction, tape the bill exactly as you did the “dummy” and, following the last step again, proceed to print, this time on the actual bill.
Making the Dye:
What you’ll need:
- a dye pot
- a rinse bowl
- blue fabric dye- like Rit (available at most grocers)
- tongs or rubber gloves
Put 4 cups water (room temperature) in a metal or glass bowl or pot, then add:
1 Tablespoon (15 Mll) blue dye for a regular strength solution.
- 1. Soak individual bills in the dye at room temperature for 5 minutes, stirring a bit. (If you are dying many bills you can heat the dye solution to 90º and die each bill for a few seconds.) In any case, don’t dye much deeper than a light blue.
- 2. Then wash by hand carefully in clean water for a few seconds.
- 3. Rinse well and lay out on newspaper to dry.
- 4. If you want the bills to lay really flat (classy!), before they are totally dry, pile them in a neat stack inside an old newspaper and place that under a stack of books to dry overnight. That’s it! Now the really fun part- spending them or giving them away!
Video Tutorial (detailed, for processing many BlueBills)